JPG text editing
Edit text in a JPG when the layers are gone.
A JPG has pixels, not editable text layers. Start by deciding whether you need to replace existing words, add a new label, or extract text, because each job needs a different tool.
Upload and prepare the edit before signing in. Credits are only used when generation starts.
Real source, actual output
A public-domain JPG price sign changed from 49 to 39 with ImageTextEdit.
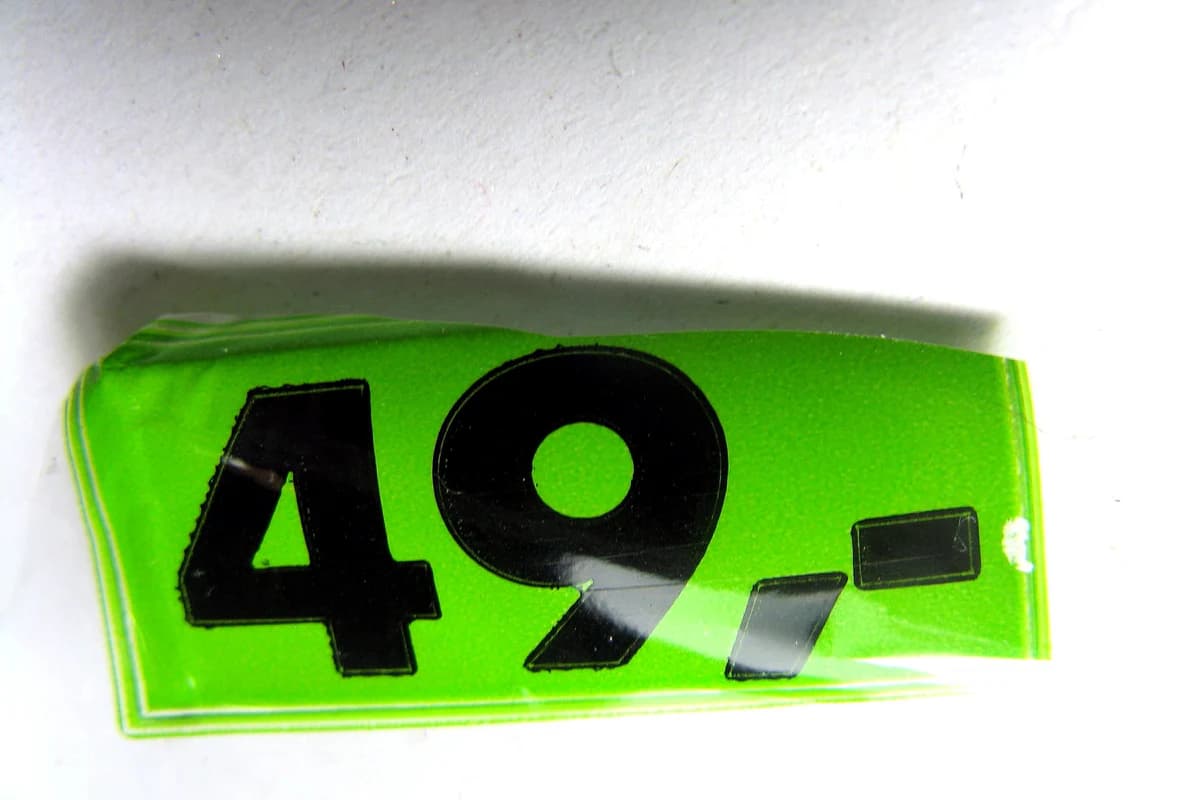 Before
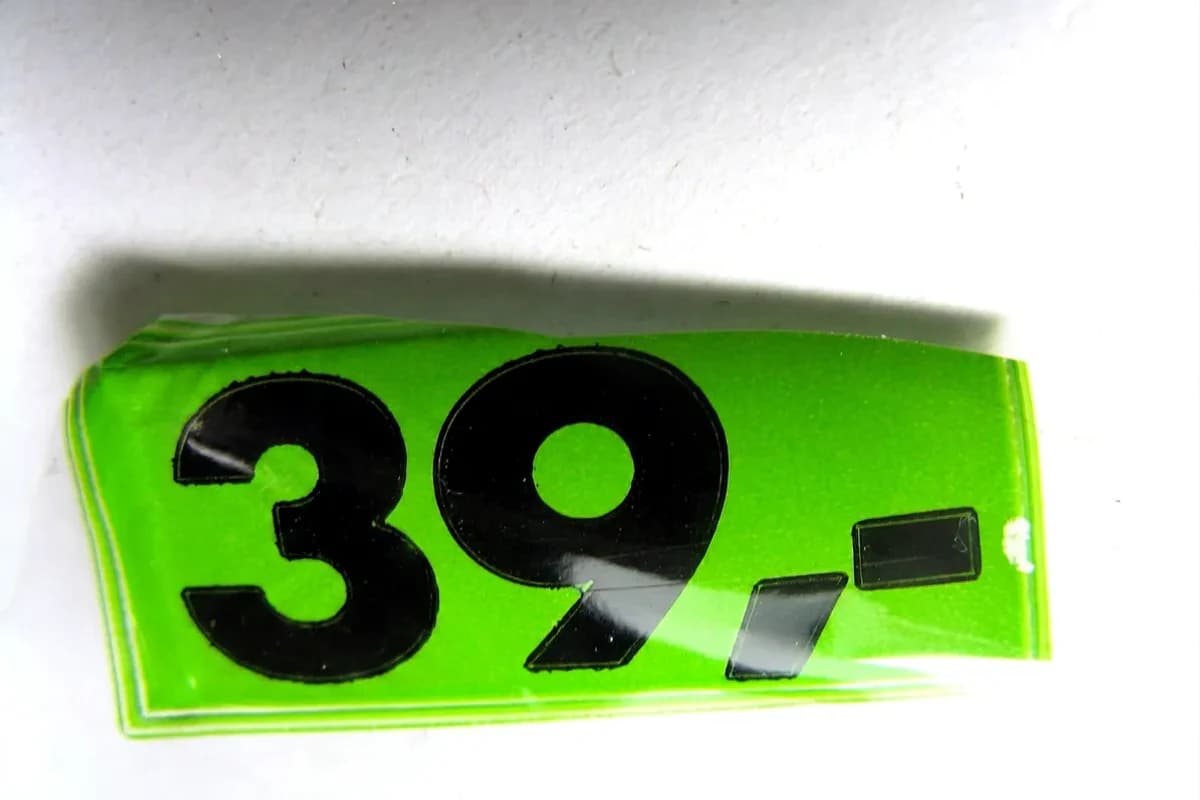 After
AfterSource: Price.jpg by Paolo Neo · Rights: Public domain (commercial use permitted by the author)
01
The words in a JPG are part of the picture.
Once a design is exported as a JPG, its letters, shadows, texture, and background are flattened into one grid of pixels.
That is why clicking a word in a JPG does not reveal a font, text box, or cursor. The file no longer knows which pixels form the text and which form the background. It only stores the finished image. If you still have the original Canva, Photoshop, Figma, PowerPoint, or other editable source, change the live text there and export a fresh JPG. That gives you the most exact result and keeps the design editable for next time.
If the source file is gone, replacing the wording becomes an image repair. The old letters need to be removed, the hidden background needs to be rebuilt, and the replacement needs to match the nearby perspective, color, lighting, and texture. A focused image editor can generate that small region while leaving the rest of the JPG alone.
02
Choose the job before you choose the editor.
Search results for JPG text editing often mix three different tasks. Naming yours first avoids a tool that cannot actually finish it.
ImageTextEdit is for the first job: replacing text that is already baked into a finished image. It is not an OCR tool, and it is more than a text box placed over the old wording. The selected area is rebuilt so the replacement can sit in the scene instead of floating above it.
This works best for one contained change at a time. A wrong menu price, an expired event date, a misspelled sign, or a short product label is a better fit than a page of fine print. For a broader explanation of how the pixels are rebuilt, read how AI image text editing works.
03
Replace existing JPG text in four steps.
Keep the task narrow: one source, one selected region, one exact replacement, then one careful review.
- 1
Upload the best JPG you have
Use the original export rather than an image copied from a chat thread or social feed. Extra compression can soften letter edges and reduce useful texture.
- 2
Select the complete text region
Draw around every letter plus its outline, glow, shadow, or reflection. Include a narrow edge of the immediate background, but keep unrelated objects outside.
- 3
Enter only the replacement text
Type the wording exactly as it should appear. Check capitalization, punctuation, currency symbols, and spacing before generating.
- 4
Generate and compare with the source
Inspect the result at full size. If the spelling, baseline, texture, or nearby detail is wrong, adjust the selection or wording before trying again.
You can prepare the whole edit in the image text editor before generation starts. The blank upload remains the main path, and no credit is used merely for uploading, selecting, or typing the replacement.
04
Your selection tells the editor what it may rebuild.
The smallest possible box is not always the safest box. The editor needs the complete lettering and enough nearby material to blend the repair.
Include the whole visual treatment
Capture drop shadows, outlines, highlights, and any texture inside the letters. Clipping them can leave fragments of the old text behind.
Leave stable objects outside
Keep faces, logos, borders, icons, and nearby labels out of the selected area unless they genuinely need to be rebuilt.
Work one region at a time
A single compact repair is easier to inspect than several distant changes generated together. Finish one, then move to the next.
Use a larger source when possible
If the text is already blurry or blocky at full size, find a higher-resolution export. No editor can recover detail that the JPG never retained.
JPEG compression can create small blocks or halos around high-contrast letters. Those artifacts are part of the source pixels, so inspect the repair at the same zoom where the finished asset will be used. A result that looks natural in a web card may not be suitable for a large print.
05
Check the repaired JPG before you publish it.
Generated image repair is not a substitute for a final human review. The wording and the surrounding image both need to remain true.
- Read every letter, number, and symbol at full size.
- Compare the baseline, spacing, angle, and scale with nearby text.
- Look for smears, repeated texture, or remnants of the old wording.
- Check that borders, objects, and labels outside the selection stayed intact.
- Keep the original JPG so the change can be reviewed or reversed.
- Confirm you own the image or have permission to update it.
For a step-by-step workflow that also covers PNG and WebP files, see how to edit text in a flattened image without Photoshop.
06
Common questions about editing JPG text.
Can I click and type over text in a JPG?
Not as an editable layer. A JPG stores the visible result as pixels. You can add a new text box over it, or use image repair to remove and replace the existing wording.
Should I convert the JPG to Word first?
Only if your goal is to extract the words. OCR can make text searchable or copyable, but it does not preserve the original image style or replace the visible wording inside the picture.
Can I keep the same font?
A generated repair uses the surrounding pixels as visual context, but it does not recover the original font file. Review the result for a convincing style match rather than assuming exact font identity.
Does the workflow also work with JPEG files?
Yes. JPG and JPEG are names for the same image format. ImageTextEdit accepts JPG, PNG, and WebP sources for this finished-image repair workflow.
What if I need to change several paragraphs?
Return to the original source file when possible. For a complex layout or many precise changes, a layer-based design tool gives you more control than repeated generated repairs.